Sunday, January 12, 2014

Pajama Refashion - Cowl Neck Sweater

Inspired by this tutorial I decided to try my hand at making my own DIY V-neck-with-cowl-collar. The original looks pretty sharp 'cause her cowl neck fabric matches the shirt. I assume she made the shirt and had left-over fabric. I don't have the resources on-hand to be that matchy-matchy. I'm working with what I've got laying around.

I've had this green v-neck sweater in my "refashions to do" bin for a while. It doesn't fit me anymore. Seeing how tightly it stretches across my dress form should inspire me to get to the gym more often. But it doesn't.
This used to look so cute on me...
Then - I needed cowl-neck fabric. Back to the bin and I pulled out these old pajama bottoms.
Soft, decent color. You'll do.
I need the entire leg to wrap around the neck-line. So it was just a big chop.
Just a leg.

Then, I got to pinning. I folded in 3 pleats. Let me jump ahead and say it wasn't enough. I like this project and would do it again, and will use more pleats next time.

Three pleats -not enough.
 Then, I sewed that in place. It was a bit difficult to get those pleated areas through -- it was pretty thick. The, back onto the dress form to wrap the rest of the fabric around the neck and pin in place.


Once sewed in place, I was left with a weird end. I consulted the original tutorial and tried my best to mimic it, but this was a bit tricky. I ended up putting in behind the original portion and sewing it down. But, it was lumpy. I had to undo those stitches and try again.
Not quite right...
Better.

At this point, I tried it on myself. Even though the sweater was too tight for me, overall it was pretty cute. I like to wear infinity scarves a lot, so this was like having one built in. I decided not to do any buttons because without the pleats, they just didn't look right.

Overall, good project. I'd do it again. And if you're looking for a 30 minute project, give it a shot.

More pics...


Out of the Attic

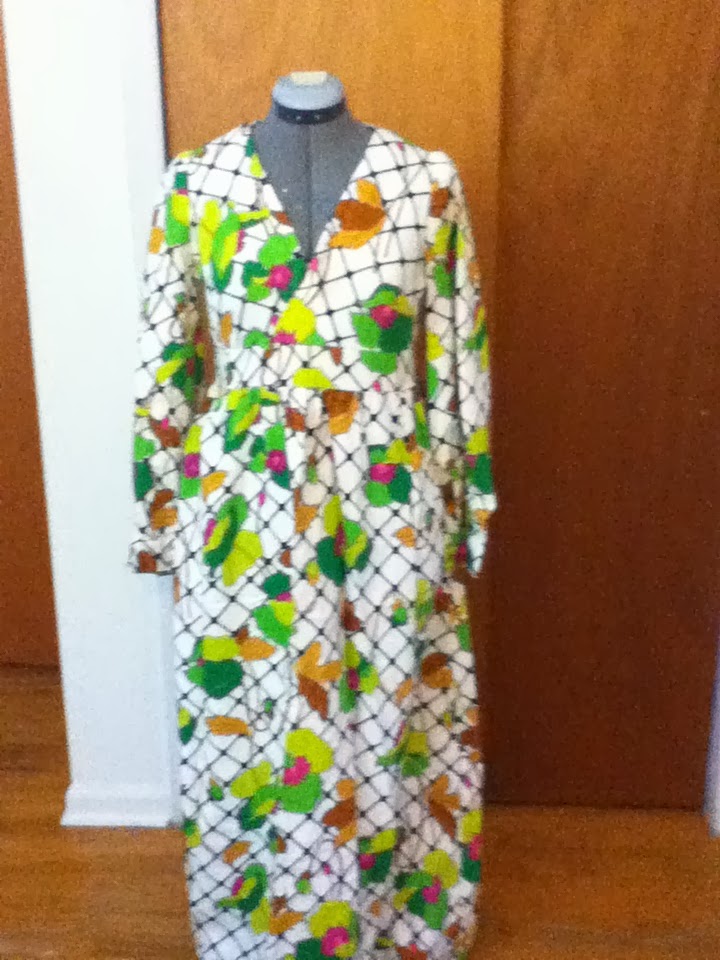
My sister-in-law (who is also one of my best friends from high school) recently gave me a box of clothes that belonged to her mother. Her mom had attended Fashion Institute of Technology, though when I knew her she was an English teacher by profession. Several dresses in the box were made by her, probably in the 70's. I knew that a few would become great refashions. I started with this one - I LOVE the print of this fabric.
Great print - just needs a few quick updates.
 However, the long sleeves and length needed to go. This became a super-quick refashion. Also, it was a bonus that it fit through the bust, waist and hips.

I used my seam ripper to unpick the sleeves -- took about 10 minutes.
Bye sleeves. I hope to use you in another project some day.
Then, I just pinned all around and sewed those raw edges down.

Next, all that was left was trimming off the bottom of the dress. I did that on my dress form and followed the line of the pattern. Luckily, it was even. And while I usually don't like hemming, I knew I had to do it. So I followed it over twice, pressing and pinning as I went and then ran it through the machine. And done!

Cut, but not hemmed.

From the back.

The finished product. I'm practicing the pose I see other bloggers doing. It's weird.

Post-ponytail. I look a mess, but the dress is cute.

After - Fabulous for today.
Before - Fabulous for it's day.