Tuesday, June 12, 2018

Reupholstered Footstool

I bought this footstool at a garage sale for a mere $3.
The hole cost extra. 

It's well-loved. 

Isn't it lovely? I knew right away that I could easily reupholster it, and probably paint the wood a darker color to match my other furniture. Nearly a year later, I still hadn’t done it. But that changed this weekend!

The underside. Just remove the 4 screws holding the cushion in place. 
As I started taking the bolts off to release the cushion (using just an Allen wrench) I realized I would probably need a staple gun for this project. I don’t have one and I knew if I set this aside while I found one to borrow, it would never get done. Glue gun to the rescue! (Is there anything a glue gun can’t solve?) 

Taking off the old fabric involved taking out the existing staples – I used a flathead screwdriver and pliers. Not hard, but it was time consuming. 


Months ago, I bought some great orange and white geometric print fabric and luckily, I still like it. (Full disclosure - I spent $23 on this fabric BUT I will get the footstool and covers for 2 sofa pillows with it.)  

After that, I used the old fabric to measure my new fabric, cut it out and folded it over the cushion. I wrapped it like a present, using glue along the edges and pulling it tight and smooth across the top. Make sure you center the fabric as you’d like it to appear. I didn’t do this but got lucky that it looked good. Something to keep in mind next time. Then just reattach the cushion and you're done. 

I didn’t paint it yet as it was raining and I thought a warm dry day would be better. But when I do, it will be simple to take the cushion off, paint the wood and put it back together again.

Relaxing after a not-so-hard project. 

Up next – matching sofa cushions!


Thursday, February 8, 2018

No Sew Halter

Maybe I'm late to the game with this one, but really wanted to share. Enjoy this "refashion" of turning a tank top into a halter.

I'm Going to Save You $38 on this Scarf!

A woman I regularly sew for introduced me to infinity scarves with a zipper pocket. The pocket can be used to hold your phone, ID, mittens and hat, generally anything small that you might want to carry around without having to lug a purse with you. She's a senior caretaker and needs to have her hands free so I've also added pockets to her scrub pants and tops (that's another post.)

I looked online to see examples of these scarves and holy cow - they can cost up to $40!  Most of us already have infinity scarves (and if you don't, they are the EASIEST THING TO MAKE for cheap.)

She brought me her two favorite scarves and I added to each a zipper and a two straight lines of stitches to make a pocket and done - for less than $2.00 each! 

A lot of novices sewers aren't keep on working with zippers, but get over it. There are tons of tutorials on Youtube to help you out and once you get a few done it's not as daunting as you think. I'm no expert and didn't have internet at the retirement home where I volunteer so I was winging it, but I still managed.

Here's what I did.


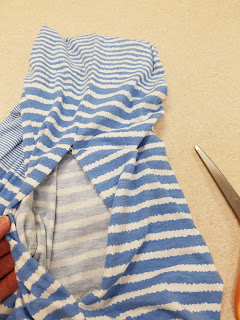
Started with a regular infinity scarf and cut a zipper length along the seam.
Infinity scarf with zipper

Infinity scarf with zipper
My zipper was too long, so I cut it and just sewed across the bottom to secure it. Don't sweat the small stuff.  


Infinity scarf with zipper

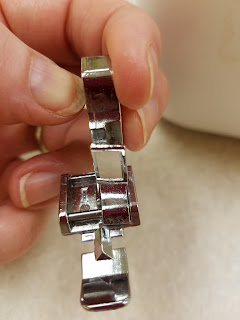
First things first - a zipper foot helps. I doubt it's something you MUST use for zippers but it helps. Most sewing machines come with some basic footers and this is the zipper foot.

zipper foot
Zipper foot. The more you know...

zipper foot
The zipper foot lets you get right up close to the zipper and easily slides over so you can do both sides of the zipper. See that little cut out area? That's where the needle does it's magic. (Ignore my gardening finger nails...) 


This is where I just started winging it, so if you're already good with zippers do it the way you know how. I turned the scarf inside out and pinned the zipper in place in the area I had cut out. Full disclosure - I did this wrong the first time and ended up sewing the zipper in such a way that I closed the seam all together with the zipper just hanging out all useless. So I had to start over.

I decided I didn't need to turn it inside out. So here's what I did that worked out correctly. I lined up the one side of the open seam along the zipper and sewed it.

Sew simple! Ha - sewing puns. 
When you get to the zipper pull, leave the needle in the fabric, but lift the contraption that holds it all in place so you can move the pull down out of your way. Then finish up that side. Turn the scarf so you can sew across the top, making a right angle. Then sew back down the other side. You're basically sewing a box.


Now you just need to sew a straight line at the end of each side of the zipper to make your pocket, otherwise the stuff you put in there will just get lost. You can make your pocket as wide as you want, I went about 2 inches to either side of the zipper.

And then you're done! A $40 scarf for the cost of a zipper!


Infinity scarf with zipper